
This is the GTV6/Milano performance page. It will have info on what I have found works, and what doesn't. I will also include the Autodelta instructions for building a 200hp 2.5L Busso V6.
Introduction
It seems that all auto enthusiasts want more power from their cars. This desire permeates the entire enthusiast community, from the VW Beetle fans all the way to owners of modern Ferraris. It doesn't seem to matter to the Lamborghini Diablo owners that their cars can already approach 200mph, some of them want more and shell out big bucks for twin turbo conversions. In view of this it's no surprise that most owners of Alfa Romeos, Fiats and Lancias are frequently searching for ways to get more power out of their engines. This is especially true of the GTV6 and Milano crowd since at one time our cars were once among the very fastest cars being produced. However, new cars have become much more powerful since the early 80's, primarily due to the advent of advanced fuel injection systems and four valve per cylinder engines. Now our V6 Alfas are having a hard time keeping up with even the more mundane Hondas and Toyotas. This does not have to be the case. It's quite possible to get more power out of the old Alfa engine. In fact it's possible to get a lot more power. Many Alfa Romeo engines are capable of producing 100 horsepower per liter WITHOUT forced induction or nitrous. I don't know of any other two valve per cylinder engines that can do that running on gasoline. Incredible amounts of power can be achieved by using forced induction. It's possible to build a 400 horsepower supercharged 12-valve 3.0L V6! Of course the clutch and transaxle would have to be seriously upgraded to handle it.
Certain traditional ideas and methods for souping up engines don't seem to work all that well on Alfa's Busso V6. To understand why we need to have a review of basic hot rodding techniques and history. Most common methods of boosting an engine's horsepower comes from experience with the American V8s, usually the small block Chevrolet (SBC) engine. The SBC is by far the most commonly hot rodded engine in history. It was built in various displacements from 265ci to 400ci over the years. It's a decent engine, but compared to an Alfa V6 the SBC is very primitive. Why did they build it in so many displacements? The answer is simple: the most effective and economical way for a MANUFACTURER to increase the power output of a mass-produced engine is to increase it's displacement. When the Chevy sedan grew for the 1957 model year they just made last years engine a little bigger. It went from 265ci to 283 ci. In 1967 they wanted a more powerful engine for introduction of the Camaro, so they grew it to 350 ci. Then they needed it to power 4500 pound sedans so they enlarged it to 400 ci. It was a whole lot cheaper to increase the displacement than to design and build a better engine using opposed valves, overhead cams, etc.
Now one day, some guy with a 1970 Chevrolet Malibu with a 350 in it decides he wants more power. He goes down to Pep Boys, buys a four barrel carburetor, an alloy intake manifold, and a pair of headers. He throws away the old two barrel carburetor, installs his new parts and replaces the old single exhaust system with a nice dual set up and blasts off. He tells everybody his car has gained almost fifty horsepower, and guess what, he's right! The reason this worked so well for him is that the factory installed a carburetor and exhaust system that were way too restrictive in the first place. Why did the factory do this? They did it because they know that most buyers of a 350 powered Malibu are not that concerned about drag racing so they save fifty or so dollars per car by using a cheap two barrel carburetor and a single exhaust. They only put four barrel carbs and dual exhaust on the higher performance models. Even if he had a model that came with dual exhaust and a four barrel carburetor, he probably could have gained 20 horsepower with just the headers. Why? Because the stock exhaust manifolds are designed to be inexpensive, trouble free and quickly installed on the assembly line. For power output they are so bad that even the poorest header is a great improvement. The factory's view is if he wants more power he can buy a bigger engine (396's and 454's were available in that chassis) so why should they slow down their assembly line and reduce profits by using a decent exhaust manifold?
So how does all this apply to the Alfa V6, or any other Italian car? Due to a variety of factors, which included a tax based on engine displacement, Italians did not have the option of building big engines. Instead, they designed small engines that had the power of their larger engined British and German competitors. To do this they could not build a engine that was hopelessly under fed by a tiny carburetor or had a restrictive exhaust manifold. There are some exceptions - in the late 70's and early 80's some Fiats and Lancias were horribly restricted in an effort to pass emission standards.
So...You want more power
Well if you read my introduction you probably know what I am about to say. There is no easy or inexpensive way to get a huge increase in power from the Alfa 2.5 or most other Italian engines. Simply bolting on headers wont do it. The best place to start is by making sure your car is giving you all of its stock power. There are a lot of Alfas out there running around in a poor state of tune. I recommend you click here to read Greg's tune up instructions.
Exhaust
Most Italian cars have an excellent exhaust manifold from the factory. As an example, a couple years ago I went to an Italian car specialist north of Dallas. This place has some fantastic stuff. The proprietor named Bob had the nicest Fiat 124 racecar I have ever seen. I noticed that he had gone to great expense and trouble to have his own header fabricated, which seemed strange to me since there are a number of headers on the market for these cars. I asked him about it and he said he dyno tested all the available headers and found none flowed as well as the Fiat's stock 4 into 2 exhaust manifold! In short, that is the problem with headers on Italian cars. Our stock manifolds are pretty good, and are about ideal for a stock engine. In most cases, power gains from headers on a stock engine will be minimal, and you may even lose power.
More power equals more exhaust so you will reach a point where the stock manifolds become restrictive. If you have a souped up engine, it stands to reason that headers could help. However, it's not that simple, as all headers are not created equal. When shopping for headers I look at a number of factors. The fit of the headers is important. Most of the headers on the market are pretty good in this regard, but some older designs had very poor machining of the header's mating surfaces. This resulted in frequent failures of the exhaust manifold gaskets. I don't want to be changing those gaskets every three months. Next I look at the pipes. They should be as close to equal length as possible from the exhaust port to the collector to promote effective exhaust scavenging (note: this is absolutely NOT a factor with a Roots supercharged engine when under boost). If those two factors seem OK, I take a look at how the pipes merge under the car. I don't want to lose ground clearance, so if they merge together in a triangle, that's bad. Ideally they should be side by side under the car so that ground clearance is not lost. Next, I determine if they will come too close to the starter. If they do, it will heat up the starter and shorten its life. Ideally I would like to keep the starter's factory heat shield in place. Aftermarket headers often won't allow that. As long as you can get some kind of heat shield in there and there is an air gap between the header pipes and the shield, you should be ok. Now I take a look at what type of material the headers are made out from. Ideally I want stainless steel. There are two reasons for this. First of all, the exhaust environment is corrosive and conventional tubular steel doesn't seem to hold up well long term. Another reason, and one that's often overlooked, is stainless' low coefficient of thermal conductivity. Simply put, that means stainless keeps the heat inside the pipes very effectively. This helps keep exhaust gas velocities high and promotes effective scavenging. Last, but NOT least, I look at the pipes inner diameter. They need to be significantly larger than stock to handle the increased demands of the engine.
Sadly, at the time of this writing there is not a single brand of headers on the market that meets all of these requirements. I don't want to spend money on headers I won't be happy with, so I am holding out for something better. Until then I am using stock manifolds with ceramic coatings. This helps flow a little, looks good, and reduced under-hood engine bay temperatures, which translates into slightly lower intake air temperatures.
Somewhere in-between stock manifolds and headers lie a product I will call an "improved exhaust manifold". These are exhaust manifolds that are not exactly headers, but not quite like the stock cast exhaust manifolds. The Alfa factory made the famous "SZ" manifolds which fits this description. They are high quality and certainly flow better than the stock manifolds, but they are not a true header. I have seen pictures of a similar product from South Africa - I have not seen any of these in person. It stands to reason that they will give a performance increase without any of the fitment issues with true headers. It also stands to reason that they won't give the performance of true headers. It's also possible to enlarge the passages in the stock exhaust manifolds with extrude honing. However it's really expensive and I wouldn't expect big gains. This is often used in forms of racing where everything has to look stock. In other cases it's just not practical.
In summary, if you have a stock 2.5, headers will offer minimal benefits. The engine puts the demands on the exhaust manifolds/headers, it's NOT the other way around. If you have a souped up 2.5 or a 3.0, headers will help. However, if you cannot find headers that meet the criteria described above, then I suggest you put your money into another part of the car.
The rest of the exhaust system can be modified as well. However I have tried nearly every possible combination of parts and I feel very comfortable with the following statement: Nothing you do aft of the catalytic converter on a stock 2.5 will add any measurable amount of power. Even the catalytic converter is not a serious restriction on these cars. Most replacement alternatives are illegal for road use and offer minimal benefit. Some hang down too low sacrificing ground clearance, and some don't increase power at all. For street use I usually keep the stock converter, and I have had some excellent dyno results with that unit. For off road use, I suggest connecting the headpipes with a "Y" or "X" pipe to help the cylinders scavenge the opposite banks.
Aft of the converter lies the center and rear exhaust sections. Modifications to these sections change sound but don't really do much for power. However most of the aftermarket pieces made by the usual suspects ANSA, CSC, and Stebro are stainless and will last a long long time. They are also lighter than the factory pieces by a considerable amount. I consider these good replacement options when you stock system is rusted out, just don't expect a big increase in power. For performance purposes, the best option aft of the converter is dual side exiting exhaust with no mufflers. There is no such thing as a "performance" muffler - a muffler is a performance reducing device. Eliminating it entirely will increase power (very slightly in this case) and reduce weight. The side exits also serve to keep exhaust heat off the rear brakes and generally make servicing the car easier. I use side outs directly off the converter on my street Alfas and I am happy with them. It's loud, but it's optimal for performance, it's cheap, and it's legal.
Fuel injection and air intake modifications
Like the exhaust, there is not a lot to be gained by playing with the injection system on a stock engine. That's because the factory settings provide an air fuel ratio that's just right on a stock engine. I keep hearing about magical aftermarket systems that will add 15 horsepower to a stock 2.5. Don't believe it! Perhaps 5 horsepower, but not 15. This seems to come from a common misconception that the fuel injection system puts demands on the engine. As with the exhaust system, it's actually the other way around. On a stock engine the only real power increase with an aftermarket system comes from the elimination of the airflow meter. However, anyone who has ever measured the pressure on both sides of the AFM will tell you that the pressure difference across the AFM is minimal. Now if you are running a modified engine, that's another matter. Aftermarket injection will allow you to maintain an ideal fuel/air mixture across the rpm range. That will be worth some power. Just don't buy and install an aftermarket system on a stock engine and expect big gains.
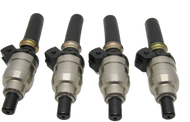
If your engine is highly modified it may need larger injectors. The stock injectors are barely adequate for a stock 3 liter. If you have a modified 3.0 or a 2.5 with over 180 hp, then larger injectors are a good investment. The stock injectors have a maximum recommended duration of 80% at which they will spray in enough fuel for about 180 hp. If you try to get more out the stock injectors you run the risk of overheating an injector coil which can result in injector failure and engine damage!
More fuel flow can be gained without increasing injector duration by increasing fuel pressure. However that's not as effective as using larger injectors and is not recommended.
A lot of people install a K&N air filter in search of easy horsepower. Like so many other things this product does very little on a stock 2.5. The K&N filter is still worth buying though because it can be cleaned and re used over and over. Just don't expect more than about a one horsepower gain.
Some people open up the airbox and remove the square entry port that guides air into the AFM. Don't do this! That does nothing for performance and increases the chance of foreign object damage.
These new cone style air filters are all the rage with the rice crowd and have become available for our cars. If sized correctly, and with a source of fresh air, they can help. Most cone filter setups I have seen do not locate the filter near the cold air duct and will cause a small loss of power. When it's in production we offer the Ultimate Main Air Intake Hose and cone filter set up that will provide an increase in power even on an otherwise stock 2.5 with even greater gains on 3 liters and modified engines. Put this on your car and you will notice a difference
Larger intake runners will help. I plan to add more on this subject later.
Camshafts!
Camshafts are the heart of a engine. No part has a bigger impact on an engine's characteristics than the camshafts. Changing your camshafts for higher performance ones will increase your engine's power.
There are a number of camshaft options for the Alfa V6. Cams are available from Alfa Romeo, Colombo & Bariani, Catcams and others. Many people use the camshafts from the Alfa 164S. These cams give a honest five horsepower increase on an otherwise stock 2.5 with no negative effects. With most engines it's possible to regrind the cams by removing metal from the bottom of the cam lobes to increase lift and/or make other profile changes. However, on the Alfa V6 this isn't possible because there just isn't enough metal on the bottom of the lobes. I have heard of people adding metal to the lobes via some special welding and then grinding them. However, I don't know of anyone offering this for the Alfa V6, nor would I be comfortable with cams created this way until they are proven.
Of course if you are willing to sacrifice low end power, economy and drivability, then the Autodelta cams or the hotter cams from C&B, Catcams etc. can give you large power gains, provided you also raise the engine's compression.
Autodelta Modifications resulting in 200 horsepower
A lot of people ask about the Autodelta publication which provides instructions for building a 200 horsepower 2.5 liter V6. It's a very good publication, and since Autodelta worked very closely with Alfa Romeo building GTV6 racecars, it is essentially an official Alfa Romeo performance guide. The only problem is it was written in the early 80's and a lot has happened since then. I will reproduce the document here exactly as it was written, grammatical errors and all. Gabor K. has been kind enough to point out some probable errors in the camshaft specs (he says the part numbers are correct but the timing specs are for standard cams). The type in boldface is the actual Autodelta text. Below each item on the Autodelta list I will describe it and put my own modern spin on it. Of course, before you go tearing into your 2.5 you should add up the cost of all this. Building this engine will be very expensive. You will end up with a powerful engine but it will not pass emission, nor get decent fuel economy. You can get the same amount of power for less money with a 3 liter and still have a nice streetable engine. Of course, Autodelta wrote this before the 3 liter engine was available.
2.5 AUTODELTA OFF-ROAD CONVERSION (200 HP)
H.O. Parts required for Off-Road application
-Pistons, liners 10.5 5339 Source:Shankle
This seems simple enough, raise the compression from the stock ration of 9:1 to 10.5:1. I think part of the reason they listed this item first is because it's not possible to gain a lot of power on the 2.5 without a compression increase. I personally like Venolia pistons, although for a normally aspirated engine I might go with JE pistons. There are no more Shankle pistons.
-Pistons, Autodelta 11900.02.300.040 Source:A.R. Inc., Spec. order
Here Autodelta is giving us a second piston option. These are a special order item from Alfa. From this document we can only guess what the compression ratio was. Gabor K. believes these to be 11.8:1. If you plan to run that much compression on Oklahoma's 91 (r+m/2) octane gasoline you will need a seriously good water/methanol injection system.
-Valve, INL 3871 Source:Shankle
-Valve, EXH 3870 Source:Shankle
These are oversized valves. You can get them from various sources.
-Camshaft, Autodelta 11936.04.000.202 36deg50'-60deg50' Source:A.R. Inc., Spec. order
-Camshaft, Autodelta 11936.04.000.201 59deg55'-23deg55' " "
High performance camshafts are an obvious must for a 200hp 2.5 V6. Camshaft specs are always somewhat mysterious, and these are a perfect example. First of all, the lift is not mentioned. Second, the duration is not clearly explained. At what valve lift is the duration measured? Without that info the few specs they did give us here are worthless. In any case, these cams were designed a long time ago and I suspect some of the newer types available from C&B, Catcams or others are better.
-Camshaft 6216 Source:Shankle
Hmm, not exactly a wealth of information here. Still, I guess we can assume camshaft 6216 is actually a pair of cams since we need two.
-Exhaust header 4425 Source:Shankle
Shankle headers had about every possible problem headers can have. They hang down really low, they rust because they are not stainless, and they constantly blow gaskets. You would be better off using SZ or CSC headers, although neither of those have pipes as large as they should be.
-Valve springs 3872 Source:Shankle
Stiffer valve springs will help ensure the valves close when they should when the engine is at high RPM
-Valve guides INL 3976, EXH 3975 Source:Shankle
-Port polishing Source:Local
Find a good machine shop for this work and be sure to specify full radius cut seats for even more power.
-Injection ECU BMW 535 Source:Bosch
I tried very hard to figure out exactly what this means. I even had some long talks with the folks at Bosch. It does not say to use an ECU from a European spec only BMW 535 or if a U.S. spec ECU is ok. What about one out of a BMW 635? It turns out they definitely meant a European spec 535. The problem is a 535 with L-Jetronic was ultra rare in Europe and even more so here. It was only built in two forms, a South African only model which was sort of an "M" car without the badge and in Europe as the M535i (this was BMW's first production "M" car not counting the M1). Both of these cars are so rare they don't even show up in the computers of most BMW dealers. In fact, if you claim you have a 535 with L-Jet they will say you must be wrong and try to sell you Motronic parts. However, all hope is not lost! The BMW's ECUs have nearly the exact same fuel curve as the GTV6's, however it eliminates the fuel cut off limit that normally occurs at about 6300 rpm. The elimination of the fuel cut off rev limiter is very important since even a mildly modified 2.5 will pull hard to about 7000rpm. We can remove the rev limiter from your ECU for a moderate fee. I also plan to put the instructions for this in my supercharging book. Our modified GTV6 ECU plus our larger injectors will enable you to replicate the set up in these instructions.
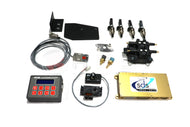
With all that said, I highly suggest you go with modern engine management for an engine with this many modifications. It will never be just right with L-Jetronic. I can highly recommend SDS fuel injection.
-Injector BMW 535 Source:" ".
Bigger injectors can spray in more fuel, it's as simple as that. I have bigger injectors for sale here. Actual BMW 535 L-Jetronic injector are nearly impossible to get since the car was never sold in the U.S. and was very rare in Europe. BMW dealers don't even acknowledge the existence of these cars. If you can find L-Jet 535 injectors they are usually about $140 each! Plus they have been out of production for so long their internal seals are already pretty old. If you upgrade to SDS fuel injection, or most other modern systems that can drive high resistance injectors, there are plenty of options to choose from.
-Increase fuel rail pressure via 0.5 spacer under fuel pressure regulator spring (3 Kg/cm squared) Source:Local
More fuel pressure in the fuel rail will cause the injectors to spray in more fuel for a given amount of time they are open. The reality is it's a lot easier to simply increase injector duration slightly with the AFM modification described here. However, when this publication was written L-Jetronic was still new and mysterious, so it seems Autodelta decided to go with this more traditional route. By the way, this modification is nearly impossible.
-Carb. group 6 Dell'Orto (see Alfa 6 microfiche) Source:A.R. Inc. Spec.order
This is for the Alfa 6 sedan which had carburetors instead of fuel injection. I suspect this is a re-jet kit, but it could be larger carbs. In any event it does not apply to an injected car.
The next items relate to other areas of the car but were included in this bulletin. It seems Autodelta thought your car should have low gears, limited slip and an improved suspension to make effective use of their engine modifications.
-Gearsets, Autodelta 10/41, 9/41, 8/41 Source:" "
These are three ring and pinion gear sets, the first is 4.10:1 which is the set in all 81',84' and later 2.5 cars. The second set is a 4.56:1 ratio. This will increase your acceleration but sacrifice economy and top speed. The third set is 5.13:1 This will give great acceleration but will lower your car's top speed too around 107mph at the stock redline in fifth.
-Limited slip differential Source" "
-Close Ratio Gearbox Source" "
-Suspension components (see P & A Bulletin Nr. 122, 7/8/82)
If anyone has this bulletin please copy it and send it too me!
-Prices (see P & A Bulletin Nr. 122 7/8/82)
-Reference - FISA Group A Fiche Nr. 5855 (674) GRA
-Resultant HP = 195 - 205
I suspect if your head work is good and you use Total Seal piston rings the resultant power will be more like 205-215. With a modern injection system like SDS I am sure you could get another 10-15 horsepower.
My Recommended Power modifications
So far on this page it may seem I have been a little negative about the prospects of making the GTV6 faster. I did not intend it to sound that way, it's just that there are a lot of things out there that will not help, or cost more than they are worth. So what can we do to get our GTV6's to keep up with those pesky newer cars with their turbos and four valve per cylinder heads? Well, actually we can do quite a lot!
Supercharging, and Turbocharging
Forced induction is the most effective way of increasing power. Both the 2.5 and 3.0 respond very well to this type of upgrade. Supercharging offers great increases in power without the loss of drivability, fuel economy and emission characteristics of conventional mods. Click here more information on supercharging.
Engine swaps
It's possible to swap in a 24 valve 3.0L from a later 164. Keep in mind engine swaps are never as straightforward as expected. It's a lot of work and expense, but you can do it.
For normally aspirated power here are my suggestions..
STAGE ONE!
Stage one is very simple and inexpensive. This stage simply involves following Greg's idle & tune up instructions. This is very important because if you car is only developing 140 horsepower due to an air leak, faulty sensor, or some other problem, then spending $700 on a pair of cams for a five horsepower gain doesn't make much sense. You need to start with a car that is making its full 154 horsepower. Be sure to follow my instructions regarding ignition timing, AFM adjustments, and all other small improvements listed on that page.
While you are completing stage one, I strongly recommend using our Silicone hose kit and converting to a manual AAV. They will help to ensure that your performance does not slowly decrease due to a developing air leak or AAV failing to close properly. It would be a shame to go through all that work and then lose three horsepower a week later when a hose starts to leak or the AAV starts to become fouled with debris.
Stage one will get the 2.5 close to 160 peak horsepower with even greater gains in the very high RPM range. Even more power can be added with our Ultimate Main Air Intake System. Removing the ECU rev limiter also helps performance a little.
Stage TWO!
Stage two and Stage three are going to cost some money and some time. It does not really matter which one you do first but to me it makes more sense to start with Stage Two. Ideally Stage Two and Three should be done at the same time
This stage involves removal and tear down of the engine. If your engine is in good shape it will cost about $1000 if you do the work yourself. While the engine is apart, upgrade it with full radius cut valve seats and Total Seal Rings. Clean out all oil and coolant passages and repair any corrosion damage you find.
It may seem like a huge project but it's really not too bad. Most of the parts in the Alfa V6 are pretty good and will not need to be replaced. If your car was not burning a lot of oil you can re-use your old pistons and liners. Since the liners only wear on the two sides where it receives thrust from the connecting rod they can be removed, turned 90 degrees, and put back in. This puts the part of the liner that has zero wear into a spot where it will receive the thrust. This is nearly as effective as buying new pistons and liners.
Put the engine back together using the following parts: Total Seal rings, improved valve guides and Seals, a new gasket set, and new bearing inserts. Have your local machine shop install the guides and cut full radius valve seats in the head. When you install the cams, take the opportunity to set the valve clearance to minimum spec. (there is some debate about this, some say that it will perform better if set to the maximum specs...)
Once put back together your engine will be more powerful than ever and more reliable. Modern head gaskets are far stronger than the original type and thus less likely to blow.
Once stage two is complete you will have a engine that is as good as new and with a noticeable increase in power at all RPM, with no negative effects. It will still get great mileage, have a smooth idle, and use less oil than a brand new engine.
Stage Three!
Stage three involves two traditional upgrades and one modern one. They are Cams, Headers, and a performance ECU.
The right cams are very important. We can't use anything too hot or our car's emissions, economy and low RPM power will suffer. Plus really hot cams require a compression increase. This means we are limited to the Mild performance cams like Alfa's 164S, or C&B's mild cams. The 164S cams are the most mild of the two. They will pass smog checks and have almost no impact on economy and idle quality. However, they only give a five horsepower gain. The C&B cams are biased more for power. That means they will give your 2.5 a little more power than the 164S cams but you will lose a little fuel economy and idle quality. These hotter cams will probably pass smog checks but it's not certain. In short, if you need to pass a smog check, want a smooth idle, and fuel economy is really important, then use the 164S cams. If you want a little more power and are willing to sacrifice a little to get it, use C&B's.
A stock 2.5 will not benefit much from headers. However a Stage Three 2.5 at full throttle has a little extra exhaust to push out so headers will help. You can use either CSC, Alfa SZ or Centerline's headers. To the best of my knowledge, no one has compared all three types head to head. The SZ headers have the advantage of factory quality. However, the SZ header is really more of an improved stock manifold than a true header.
Next, a modified ECU package will help a little. We will need the higher rev limiter due to the improvement in air flow at high RPM created by the Total Seal Rings, Cams, Headers, and so on. A modified ECU can be purchased from Alfa Heaven or a few other places. We also have a fuel enrichment device for Bosch L-Jetronic available here.
Instead of modifying the ECU, at this point I suggest upgrading to modern engine management, such as SDS. This will really enhance a Stage 3 engine.
Stage Three is as far as you can go without creating some problems. A stage three engine should put out around 175 real horsepower, pull hard from idle to nearly 7000 RPM, still pass emissions, and idle smoothly.
Suspension!
The suspension is a very important aspect of the GTV6 experience. If you have not already done so please check out the GTV6/Milano 75 Suspension Tech Article.
If you just read my engine section you probably learned that it takes a lot of money and effort to gain just 20 horsepower. Well I have good news! Great improvements to the GTV6's already excellent suspension can be made without spending a lot. A stock GTV6 handles very well, but with better tires, around $500 and a easy day in the garage you can make it as good or better than new performance cars costing far more.
I have had some reservations about writing a suspension article because handling characteristics are highly subjective. In other words handling characteristics praised by one driver may be loathed by another. There are of course some quantitative and definite handling measurements available like the slalom and skidpad but they only tell a part of the story. Other factors like predictability, oversteering and understeering traits are important but difficult to measure. All of the modifications I describe here will definitely help the quantitative factors and I will try to describe the subjective effects as accurately as possible.
Step 1, wheels and tires
Good wheels and tires are critical for a performance car. Most GTV6's and many Milanos left the factory with top quality 15 inch wheels. If you have a Milano with 14 inch wheels or a GTV6 with metric Speedlines you should replace them with 15's. The 14 inch wheels are just too small for a 3000 pound car and there are no modern tires available for the metric Speedlines. Of course 16 inch wheels are even better but the cost may out weigh the benefits. If you do go with 16's make sure they are good quality wheels. Some of the cheaper wheels are terrible and will cause all kinds of problems. Only buy aftermarket wheels from vendors that know Alfas. These vendors include Centerline Alfa and Serpent Autosport. I generally stick with the stock 15" wheels.
Tires are one of the most critical elements on a performance car. However like so many other things there is no one best size or type of tire.
Most GTV6's and Milanos came with 195/60 series tires on their wheels. You can put 205/60-15's on the car with no problems. This size is the best choice if you want to maintain your car's ride quality and original appearance while gaining a little bit of performance. Probably the best all around size is a 205/55-15. This size is a little better for performance but will affect the ride quality slightly. For ultimate performance many people use a 205/50-15. Now this size will decrease your ground clearance and make you ride noticeably harsher. You can even fit most 225/50's with a little bit of work. This size tire is the ultimate for performance. It's possible some 225/50-15's won't fit. The tire manufactures use different ways of measuring things so one company's 225 may be wider than another's. I have used Dunlop, Toyo, and Yokahama 225's in the past and they all fit provided the car has good suspension bushings and one degree of negative camber at the front.
When it's time to buy tires don't just run down to Wal-Mart and get a set of Douglas radials. All tires are not equal! Check with a good tire retailer to get the latest information. I like Tire Rack because they know their stuff and take the time to explain the advantages of one tire over another. New developments in tires are made all the time so it's tough to say what tire is the best. In the early 90's the Yokahama AVSi was about as good a performance tire as you could find. Today many all weather tires provide equal dry traction and much better wet traction so the old AVSi is totally obsolete. Sometime in 2001 I compared some 60 series tires, they were the Yokahama AVSi, Pirelli P6000 and Dunlop Sport A2s. The Dunlop's were the best all around tire in this group. Both the P6000s, and A2s had slightly better traction on dry pavement than the AVSi and they both had far better wet traction. The Pirelli's downfall was road noise, the Dunlop tires were much quieter.
For the latest tire information, ask the folks on the forum at gtv6.org as there is always someone there who has just bought new tires.
Now it's time to get into the suspension itself. The GTV6's suspension is excellent but it was designed for tires that were made in the 70's and need some minor updating to fully take advantage of the grip provided by more modern tires. Most of this work will be on the front suspension, and a little bit on the rear.
To maximize the car's grip or lateral acceleration we need to keep as much tire on the road as possible. Picture a tire from the front. As the tire leans over its contact area with the road is reduced. This reduction in contact area causes a loss of grip. As a car leans in a turn its tires will also lean over unless the suspension has a way of compensating for it. This leaning results in a loss of grip. The GTV6's front double wishbone suspension increases negative camber with suspension compression to compensate for this. In other words when the front suspension compresses the tops of the tire move in a little. This is called camber gain and it's important to understand. Because of this as the GTV6 corners the body leans over but the suspension compression tries to keep the tire upright. This feature enables the GTV6 to lean a lot more than other performance cars but still maintain its grip on the road. However the GTV6's suspension was designed in the 70's and by the 80's it had just enough camber gain to make good use of the tires that were then available. Today's tires are much more sticky and force the GTV6 to lean over so much that its camber gain is not enough to compensate. This problem is even greater on the race track where the track surface itself provides extra grip forcing the GTV6 over even farther.
There are a few ways we can stop the front tires from leaning over too much and I will be covering all of them. The easiest way is to mount a larger front sway bar, however this is also the least effective method. The larger front sway bar does reduce body roll but also tends to pick up the inside front wheel reducing its traction. Another method is fitting larger stiffer torsion bars. This works very well and is my preferred method, but it will make the car's ride a little more harsh. Converting the entire car to a coil over spring set up will do the job. In fact if you absolutely have to out corner every other car at the track, then the coil over conversion is the only way to do it for reasons I will explain later. It's also possible to increase the front suspension's camber gain by installing suspension uprights from an Alfa SZ. This is an excellent solution but should only be used in conjunction with stiffer torsion bars, or coil springs. Increasing negative camber gain by itself will reduce the tire's grip during breaking. Those SZ uprights are also really expensive.
It's also really important to make sure all of your car's suspension bushings are in good order. At the front end of the car each castor rod connects to the chassis via two rubber bushings. These bushings wear out quickly and can actually damage your car if they are not replaced. In the upper suspension arm there is a bushing that wears out and compresses during cornering causing the outside tire to lean over farther than it otherwise would. This bushing should be replaced if it's at all suspect. The bushings in the Watts linkage are critical, especially if you are running 225/50 tires. If those bushings are worn, the De Dion tube will shift during hard cornering and will sometimes cause large tires to rub on the inside quarter panels. It's very important that the bushings you use not be too stiff or they can crack the suspension mounting points. The original type of bushings work well but wear out fast. I strongly suggest you replace the original bushings with quality polyurethane bushings that are just a little stiffer than the originals. The main De Dion mount at the front of the triangle connects to the car with a giant rubber bushing. This bushing is critical and should be replaced with either a polyurethane bushing or an Alfa SZ spherical bearing.
As with the engines I will organize suspension setups by "stages". The first three stages can be completed by any competent Alfa Romeo shop. The labor cost for all three stages is quite similar. These descriptions assume the suspension is in otherwise very good condition (i.e. ball joints, tie rods, etc.)
Suspension Stage One
Stage one is my recommendation for a street car that is never or rarely driven at the track. Stage one will give an improvement in handling without changing any of the car's characteristics or sacrificing ride quality. First of all use a good quality 205/60-15 tire and wheel combination. Next replace the caster rod, upper inner suspension arm, and Watts linkage bushings with polyurethane units. Use an Alfa Romeo SZ spherical bearing at the front of the De Dion triangle. Replace the lower A-arm bushings with new factory parts. Do not use polyurethane bushings on the shock mounts or on the rear anti-sway bar. Next lower the front end an inch or two by adjusting the torsion bars. The stock front end height is way too high and the car will never handle quite right until you lower it. Have the front end aligned to factory specs and set one degree of negative camber.
Stage 1B
Add a front anti-sway bar from a Milano Verde. It's 24mm vs 20mm for a GTV6 or 22mm for other Milanos. If you have a GTV6, even the 22mm bar from a 2.5 Milano will be an upgrade. Be sure to get polyurethane bushings for the bar's chassis mounts.
Suspension Stage Two
I recommend this stage for car's that will be driven on the street and see occasional track use. Ride quality will diminish but not too badly. This stage is pretty simple; at the front it's just Stage1B plus 25.4mm torsion bars. These torsion bars are about 35 percent stiffer than the originals and will really help keep the front tires upright during hard cornering. At the back go with coil springs about 10 percent stiffer. This combination will retain all of the car's handling qualities. However the car will grip better and corner faster. Your car's ride will be noticeably stiffer but not too bad. This is the combination I have on my GTV6 road car and I think it's about ideal for real roads and a huge improvement over the stock set up at the track. A stage two car with 225/50 tires and 2 degrees of negative camber at the front wheels will out corner just about any other car, or at least any other 4 seat car. If you plan to chase newer Corvettes or other super cars then Stage Two won't be enough, move on the Stage Three.
Stage 2B
Add performance shocks.
Add a larger aftermarket front anti-sway bar. This will require reinforcement plates to be welded in.
Suspension Stage Three
This is a Stage 1 setup with the addition of the RS Racing coil-over conversion. This is the last word in GTV6/Milano handling upgrades. In includes coil-over shocks with adjustable ride height at all four corners. I can't stress enough how important it is to complete the Stage 1 upgrades before installing this kit. The RSR conversion will allow very high cornering forces that will quickly deform the factory rubber bushings. You will never get the full benefit from this expensive kit unless the entire suspension is in excellent shape.
There are various spring rates available with the RS Racing coil-over kit to suit anything from hot street applications to full race cars. Talk to you vendor about spring selections. Keep in mind the front coil-overs are in addition to the stock torsion bars. We do not remove the torsion bars with this upgrade.
Stage 3A
Add a larger front anti-sway bar. RS Racing offer two sizes, and there are other brands that offer them as well. They all require reinforcement plates to be welded onto the car.
Add a heim-jointed Watts linkage. This will primarily help transitional handling and should be considered an excellent track upgrade. I am hesitant to put one on a street car because it will put extra stress on the Watts linkage mount's. Those just don't look that strong and I am concerned about the potential for cracks to form in the structure. With a pure track car, that's not as big a concern because track cars have relatively frequent inspections for a given amount of drive time.
Suspension Stage Four
Stage 4 consists of Stage 3A, plus chassis strengthening, and some other variables described below. Just about everything mentioned in the Stage 4 section is for a track only car.

For this level of car a stiff chassis is very important. Otherwise the suspension can flex the chassis rather than move the suspension arms. Here you can see a a GTV6 race car under construction. The builder has seam welded all the critical areas. Notice that the entire seam is not welded, just certain spots. This car is being built by Csaba Vandor and he knows what he is doing. Csaba is a real engineer and a serious automotive expert. Seam welding is NOT a trivial undertaking and it's best done by experts.

Here is a roll cage in the same racecar. A roll cage adds a lot of strength. The design of the roll cage has a tremendous effect on how much it stiffens the chassis. This car has a full Stage 4 suspension with 33mm solid torsion bars instead of a RS racing coil over kit in order to comply with rules.
The GTV6 chassis flexes quite a bit.. The GTV6 seems to be stiffer than the Milano, but by modern standards it flexes a lot. Don't believe me? Try this: jack the car up with the forward jacking point, the one near the front anti-sway bar. Now put jack stands under the forward side jack points and lower the car to rest on these points. Now raise the car back up with the forward jacking point and notice when it starts to raise the front of the car. Now notice how far you have to raise the front of the car to release the jack stands. If you do this you will observe the chassis flexing A LOT.
In short, a serious track car will benefit from chassis strengthening.
Variables and little odds and ends.
Here are a few items that don't fit neatly into one of the Stage packages.
27.3mm, 33mm, and 36mm hollow torsion bars. With the advent of the RS Racing kit I consider these larger bars to be obsolete. Alfa Romeo abandoned larger torsion bars for this chassis in favor of coil-overs when they built the Alfa Romeo SZ. The SZ was a factory hot rod that was probably the best cornering production car ever built. It pulled 1.1-1.3Gs on the skidpad depending on ride height setting in magazine road tests. This was back in 1991 with 1991 tires! When the factory builds an ultimate performance chassis we need to look closely at what they did. In the case of the SZ they essentially heim-jointed everything, added coil-overs and strengthened the chassis.
Coil-overs have a few advantages over larger torsion bars. First of all, they are easier to install. Torsion bars larger than 25.4mm are an incredible pain to install. The larger bars also cause a lot of stress on the factory torsion bar mounts and will eventually cause cracking in the chassis. This is especially true of the post 1985.5 cars. The coil-overs reduce this stress by dividing it between the factory torsion bar mounts and the shock towers. Coil-overs also allow easier ride height adjustment and are relatively light-weight.
There are some cases where larger torsion bars are required. One such case is if the car is used in a racing series where coil overs are illegal, then you must use torsion bars. This is actually pretty common in the U.S. If that's your situation, use 27.3mm bars for a car that will still be driven on the street, use the 33mm or 36mm hollow bars for a pure track car only. The second case is strictly related to cost. The RSR kit is expensive. There may be cases where larger torsion bars AND the RSR coil-over kit are needed to reduce stress on the shock towers.
Cambered De Dion tube. The Alfa SZ has 3/4 of a degree of negative camber at the rear wheels, which increases cornering power. Although the De Dion tube keeps the wheels perfectly perpendicular to the ground during hard cornering, the tire itself will deform slightly and lean over. The slight negative camber helps cancel this out. If your car is a pure track car, this is a good modification. For a street car it will result in increase tire wear and slightly increased braking distances.
SZ uprights. This increases the front wheel's camber gain during hard cornering. It's a bigger factor on a really low car. The SZ has adjustable ride height and it could be set really low. I consider this sort of a track only mod because it's expensive, the part is ultra hard to find, and it will increase braking distance on a car that's at normal ride height.
Front Castor rod ball joint. I personally prefer to use polyurethane bushings here. However some people install a ball joint from a 105 chassis in this spot.
I truly hope you found this article to be usable and helpful. If you have found any errors, just let me know and I will fix them.
Please visit our other pages!